And now for something Completely Different...
- Jack's on the Net

- Apr 10, 2020
- 3 min read
...or attack of the Puppy of Doom!
Written by Sarah-Anne

Because I'm a sucker for punishment, I didn't feel like I had enough terrain for my Ruined Victorian City and decided to attempted the largest build to-date; a bridge!
Materials required:
foamcore (with the paper backing removed)
1 inch foam insulation
PVA glue
Mod Podge (tinted with black acrylic paint)
Assorted acrylic paints
Dark brown and green ink wash
Assorted sheets of green flocking
matte/satin spray sealant
crafting sand
small grass tufts
fine foam or other green flocking
Tools required:
hobby knife
Pencil/pen
Carving tools/cocktail toothpicks
Ball of aluminium foil
Assorted paint brushes
sewing push pins
When I began this project I only had a rough idea of the general size and shape I wanted, and just began cutting shapes that looked right. In hindsight I should have actually taken the time to measure the lengths and angles, but where's the fun in that?


I glued the pieces together with tacky PVA glue and while that dried, held them together with push pins.


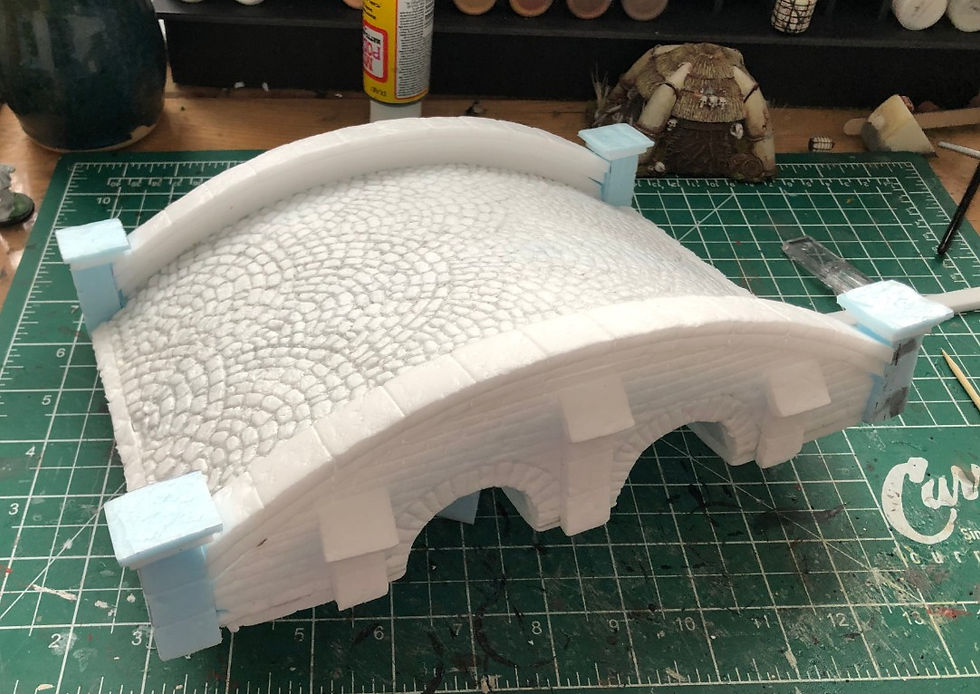
Now I debated whether to add texture to the top of the bridge before or after gluing it in place, and finally decided to do it before. I was worried that any pressure I applied when carving in the cobblestones could break the foam core, so used a hardcover book as a support behind it when I carved them. I first rolled my ball of aluminium foil over the surface, and then began drawing in the cobblestone design with the tip of a pencil.

Once the top was fully textured I glued it in place using the same PVA glue/push pin method, and textured the sides of the bridge to look like brick. I was careful to put the pushpins in the recesses between the 'cobblestones' so I wouldn't end up with noticeable little holes everywhere.


Now in crafting, accidents are bound to happen. Items get dropped, carving is a little too zealous... but I wasn't really prepared for what happened next. Now I must preface this by saying I did fully intend on making this bridge look decayed and abandoned, much as the rest of the scenery is that I built for this table. However, what I was not expecting, is that the damage would be the result of, this thing...


Behold Thea, our adorable 12 week old beagle puppy. Also known as the Puppy of Doom.
.
.
.


Luckily I was able to save it from her before too much damage was done, but it was certainly more than I initially planned on adding. It took a little creativity to work the damage into the structure in a way I was happy with (and looked less like puppy teeth had touched it!) but in the end I think the bridge turned out even better.
Now that the basic shape of the bridge was complete (and the damage contained) I started adding other decorative elements. Using the foam insulation, I added capped pillars to the ends and textured them to look like stone. I also added smaller capped pillars to the sides of the bridge, but made those completely out of foam core. Finally I added two lengths of foam core (one slightly wider than the other) on either side of the top of the bridge, also textured like stone.
On the side that Thea chewed, I started to cut away the bricks and stone to exaggerate the damage n a way that seemed more believable in bricks or stone.

I continued the damage on to the top of the bridge and started to create a crevice through the cobblestone. I realized once I had started that if I built it up enough along the edges, I could treat this like a choke-point and force models during games to go along one side of the bridge only.

I continued this exaggeration by building up larger stone pieces among the cobblestone debris, and added craft sand along the surface.

Now that the structure was complete, I sealed everything in with an even coat of Mod Podge tinted with black acrylic paint. This protects the soft foam from damage, and adds the base coat all at once.

Using grey, tan, and brown, I drybrushed all the cobblestone and other stone details. If you would like further details in how I paint stone, you can check out our tutorial here.

Next I focused on painting the brick - again, if you would like more details in how I paint brick you can check out our blog post here! I took the extra step of adding weathering with brown and green ink to the bricks and the rocks.

Now all that was left to do was add the flocking and grass tufts for more realism, and we're done!


Comments